In the first blog, we focused on ensuring we had SaltStack Config deployed (either in the cloud, or self-hosted), ensuring we had minions within the console and we understood the basics and architecture of SaltStack. This one is all about getting started with state files and actually applying some config to those minions.
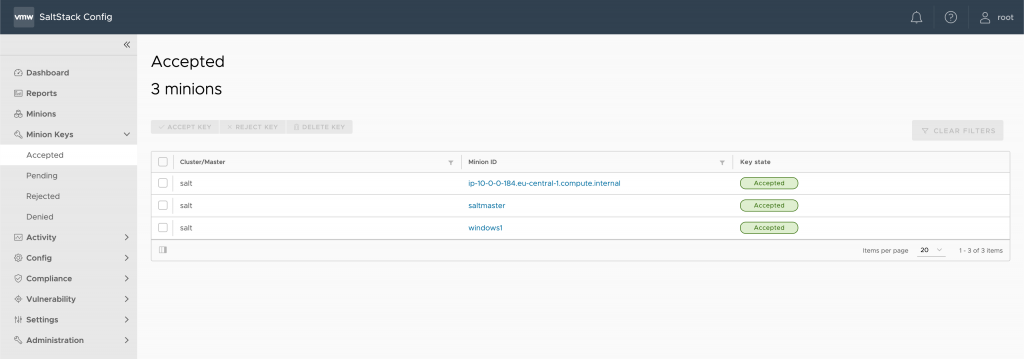
At this point, hopefully you’ve got a Windows and Ubuntu machine stood up as Minions and added to your SaltStack Config master. At this stage, you should be able to see both machines within your Minion Keys > Accepted
At this point, we’re in a position to try some basic deployments.
Installing NGINX on Ubtunu
First up, go to Config > File Server and click ‘Create’ at the bottom of the screen
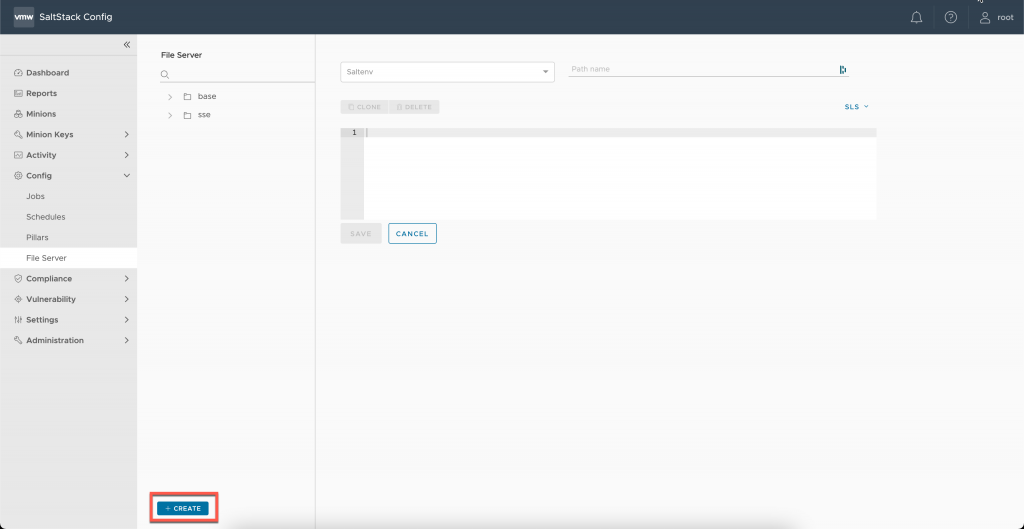
Each state should have its own sub-directory, and as this state file is to install nginx, we will place this within the base environment.
Saltenv: base
Path: /nginx/nginx.sls
Now we need to define the configuration for the desired state, which is using YAML format, a very human-readable format. Essentially what we’re trying to achieve in a basic form is to install NGINX and ensure the service is running.
# Name: nginx.sls
# Description: Installs nginx

nginx:
# Installs the nginx package
  pkg:
    - installed

# Copy nginx conf to minion
  file.managed:
    - name: /etc/nginx/nginx.conf
    - source: salt://nginx/nginx.conf
    - user: demouser
    - group: root
    - mode: 640

# Checks the nginx service is running and watches the nginx.conf file
  service.running:
    - watch:
      - pkg: nginx
      - file: /etc/nginx/nginx.conf
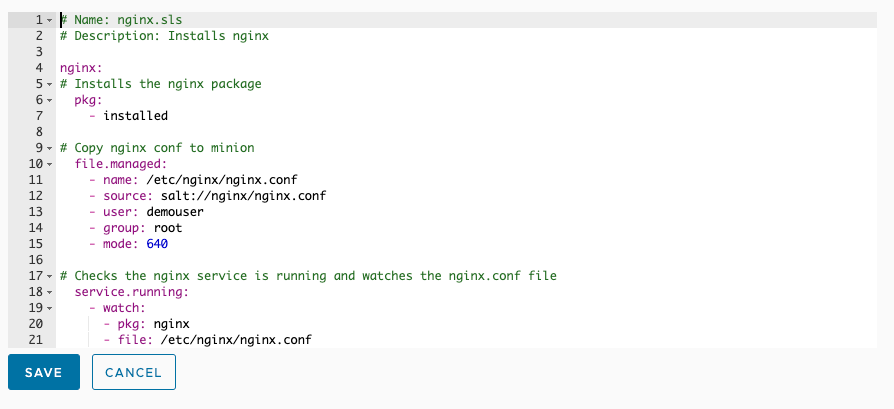
Before we carry on, I want to explain what the above does. Essentially line #4 is the name of the service, and line #6 & line #7 tell Salt to install the package.
Lines #10-15 copies the nginx.conf down to the minion and applies the correct permissions. In this case, mode 640 gives the owner read and write permissions. Lines #18 onwards essentially checks that the nginx package is running – simple huh?
So with that config, you can install nginx, and make sure the service is running on as many nodes (or minions) as you wish. However this on its own isn’t much help – you want Salt to configure nginx.conf too.
At this stage, lets push out the state to the ubuntu1 minion we have within our environment to make sure that its properly installing nginx. To do that ,we need to create a job and link the state file.
Go to Config > Jobs, and click Create in the top right hand corner
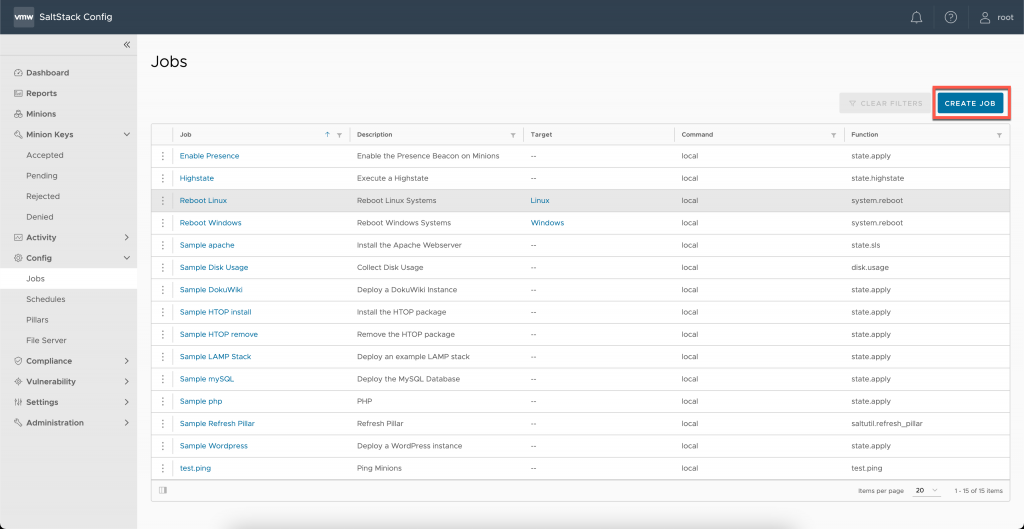
Next, you will be presented with a form detailing the job details. This allows you to give the job a name, which minions you will target with the job, which salt function you will use to apply it, the environement and which state file you wish to push. Fill the form in using detail similar to this below
Name: Install nginx
Function: state.apply
Environments: base
States: nginx.nginx
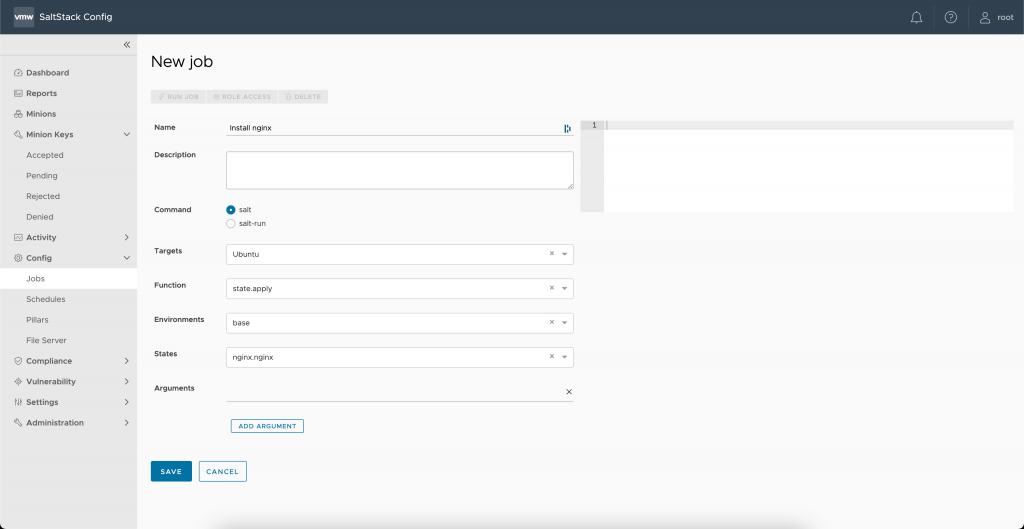
Click Save once its complete, find your job on the list and press the 3 little dots on the left hand side, and ‘run job’.
If you want to see it running, you can do so within Activity > In Progress
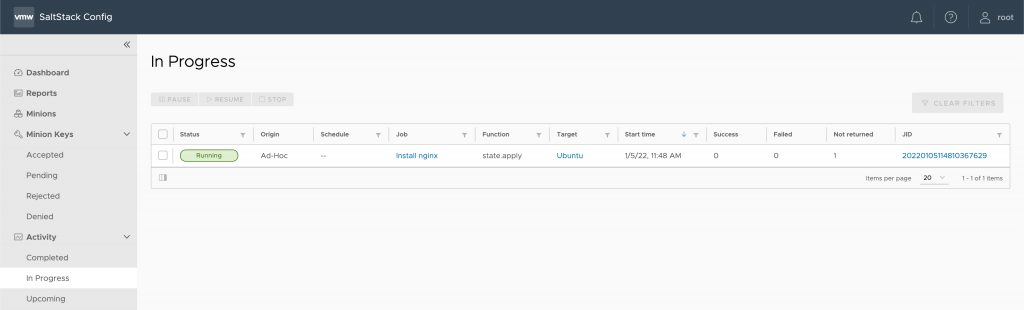
Once its completed, it will appear in Activity > Completed. And here is my job… and it’s failed…. how embarrassing.

If you click into the job JID on the right hand side, we can do some investigation. Click on the ‘RAW’ tab, and lets look through the log data. Thankfully the logging makes the answer really clear.
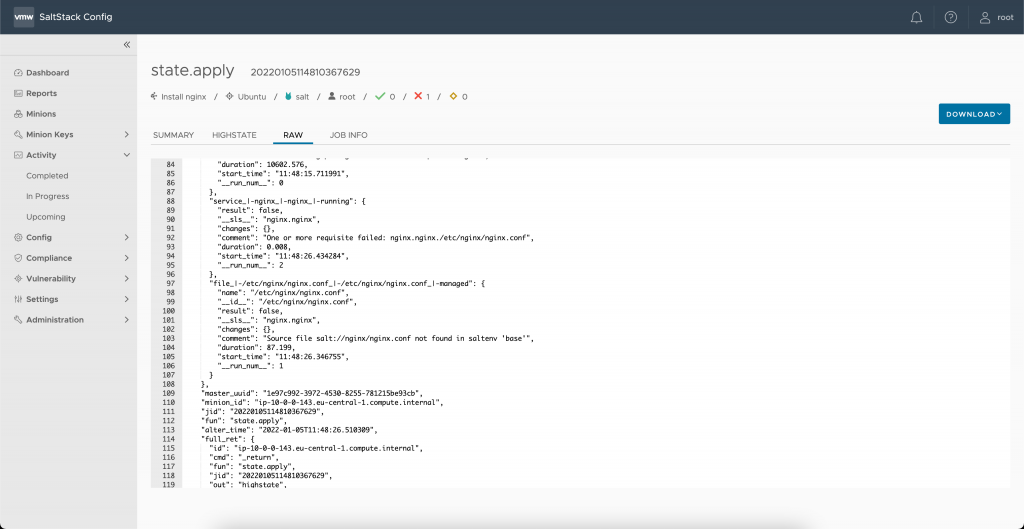
As you can see, we’re missing the nginx.conf file, which is a pre-requisite of the nginx install and I ‘might’ have done this on purpose given we defined the location of the nginx.conf file within the nginx.sls file a few steps ago. But at least it lets you know that you can diagnose failed jobs pretty easily.
The nginx.sls file is expecting the nginx.conf file to be istored within the same directory as the .sls file. So lets get a typical sample nginx.conf file, and push that down to the ubuntu1 minion.
Saltenv: base
Path: /nginx/nginx.conf
user www-data;
worker_processes 4;
pid /var/run/nginx.pid;
events {
worker_connections 768;
# multi_accept on;
}
http {
##
# Basic Settings
##
sendfile on;
tcp_nopush on;
tcp_nodelay on;
keepalive_timeout 65;
types_hash_max_size 2048;
large_client_header_buffers 6 32k;
client_max_body_size 100m;
# server_names_hash_bucket_size 64;
# server_name_in_redirect off;
include /etc/nginx/mime.types;
default_type application/octet-stream;
##
# Logging Settings
##
access_log /var/log/nginx/access.log;
error_log /var/log/nginx/error.log debug; # change from debug to warn or error for production
##
# Gzip Settings
##
gzip on;
gzip_disable "msie6";
##
# Virtual Host Configs
##
include /etc/nginx/conf.d/*.conf;
include /etc/nginx/sites-enabled/*;
server {
listen 80 ;
listen [::]:80 ipv6only=on;
root /var/www/laravel/public;
index index.php index.html index.htm;
# Make site accessible from http://localhost/
server_name domain.in www.domain.in;
ssl off;
#charset utf-8;
#include h5bp/basic.conf;
location / {
# First attempt to serve request as file, then
# as directory, then fall back to displaying a 404.
try_files $uri $uri/ /index.php?$query_string;
# Uncomment to enable naxsi on this location
# include /etc/nginx/naxsi.rules
}
location ~* \.(css|js|gif|jpe?g|png)$ {
expires 168h;
}
error_page 404 /404.html;
error_page 500 502 503 504 /50x.html;
location = /50x.html {
root /usr/share/nginx/html;
}
location ~ /.well-known {
allow all;
}
location ~ \.php$ {
try_files $uri =404;
client_max_body_size 1024M;
fastcgi_split_path_info ^(.+\.php)(/.+)$;
fastcgi_pass unix:/var/run/php5-fpm.sock;
fastcgi_index index.php;
include fastcgi_params;
}
# deny access to .htaccess files, if Apache's document root
# concurs with nginx's one
#
#location ~ /\.ht {
# deny all;
#
}
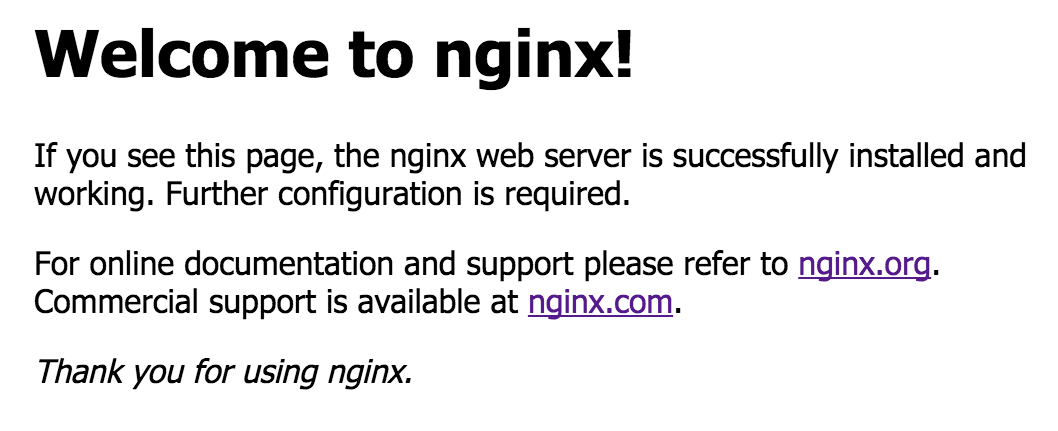
}Once that is saved, re-run that job and you should be able to open a web browser, and browse to the IP address or FQDN of your ubuntu server, and be presented with the nginx welcome page
You’ve got the basic’s working. Next we need to learn how to apply OUR config to it, using some of the salt-specific skills knowledge we’ve learnt on these last 2 blogs. Part 3 coming soon….

