In the last series with SaltStack Config, we focused more on building out a nginx configuration with beacons and reactors, but that was all done on a ubuntu box. But there is more to life than linux right? Lets see how we can use Salt to manage Windows!
I’m not going to go into the detail of getting SaltStack stood up, the terminology or how to install the minions on Windows – all the detail for that in in this blog post a month or so back. I’ll assume at this point that you’ve got a working SaltStack Config master in place, and at least one Windows Server with the Salt minion (in my case, version 3004-3).
Let’s get started. Firstly, we need to SSH into your SaltMaster to add a repository known as WinRepo. Depending on what OS your master is running will depend on what commands you will need to run, either way its pretty quick. Winrepo requires you to have GitPython installed, and you can do so by following the commands relevant to the OS your Saltmaster is running. Remember to run the following commands with root access.
RedHat/CentOS:
sudo salt-call pip.install gitpython
yum search GitPython
yum install GitPython
salt-run winrepo.update_git_repos
PhotonOS:
sudo salt-call pip.install gitpython
tdnf search GitPython
tdnf install GitPython
salt-run winrepo.update_git_repos
Ubuntu / Debian:
sudo salt-call pip.install gitpython
apt search GitPython
apt install GitPython
salt-run winrepo.update_git_repo
Below is a screenshot of me completing the install on CentOS:

It’s always good practice to make sure everything is there. So head over to the folder above to check all your state file installs are there
ls /srv/salt/win/repo/salt-winrepo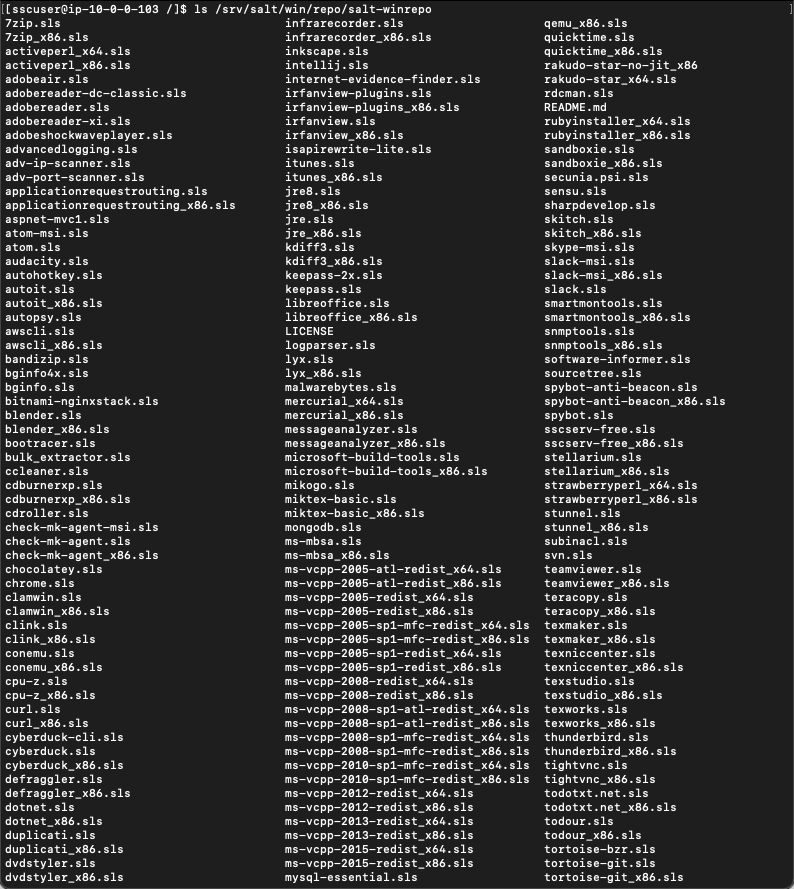
Once that is done, you can disconnect from the SSH session and go back into the SSC console. To make it easier on yourself, you might as well run a remote session to your Windows host so you can see things happening live.
OK, so lets install something with all these wonderful state files within winrepo. Go into the SSC console and create a state file with the following details
Saltenv: base:
Path: /windows_software/filezilla.sls
# Name: filezilla.sls
# Description: Installs filezilla x64 on minion
windows_packages:
  pkg.installed:
    - pkgs:
      - filezilla
N.B: you only need to pass the name of the .sls file here, not the full ‘filezilla.sls’
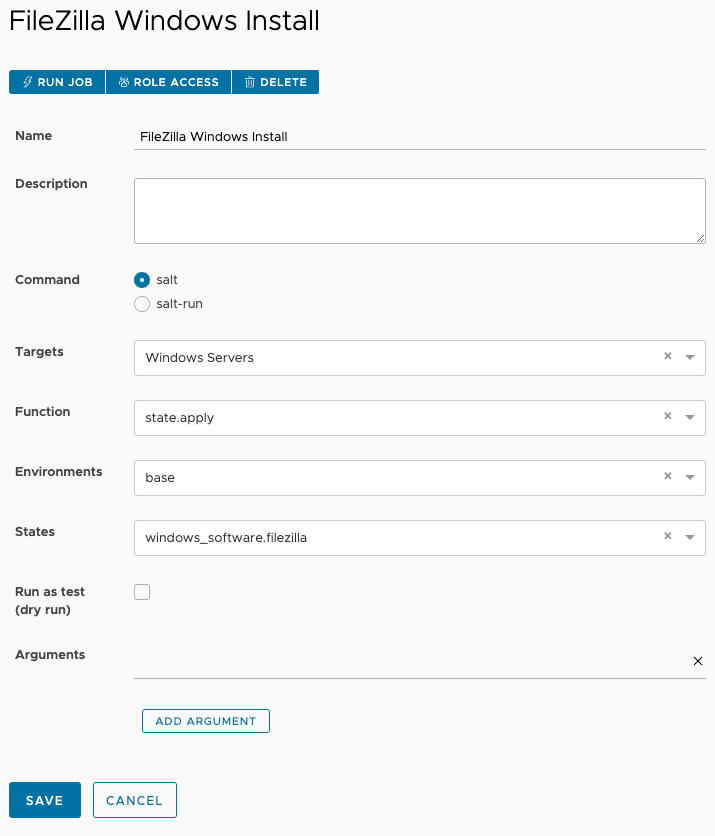
Now we’ve got the state file, we just need to create a job to run it against the Windows host itself.
Name: Filezilla Windows Install
Command: salt
Target: Blank (or Windows Servers if you’re targetting more than one)
Function: state.apply
Environments: base
States: windows_software.filezilla
An alternative way to install software from winrepo, is by selecting a minion from the minion list, and selecting ‘run command’. In the window, put in the following settings:
Command: salt
Function: pkg.install
Argument: teamviewer (the name of the .sls in winrepo without the file extension)

To understand how this works, we should look at the contents of those winrepo sls files. Lets look at the teamviewer.sls
teamviewer:
  latest:
    full_name: 'TeamViewer 11'
    installer: 'https://downloadeu1.teamviewer.com/download/TeamViewer_Setup_en.exe'
    install_flags: '/S'
    uninstaller: '%ProgramFiles(x86)%\TeamViewer\uninstall.exe'
    uninstall_flags: '/S'
    msiexec: False
    locale: en_US
    reboot: False
Honestly, its pretty self explanatory, naming the install, providing a link to where the latest download can be gotten and providing the silent install switches and how to install it. So what if we want to add our own software to this repo – how would we do that? Let’s have a go
vmtools:
  11.3.5:
    installer: 'salt://win/repo/vmtools/VMware-tools-11.3.5-18557794-x86_64.exe'
    full_name: VMTools for Windows 64bit 11.3.5
    reboot: False
    install_flags: ' /S /v "/qn msi_args'
    cache_dir: True
In this case, you can either upload the .exe onto your saltmaster and refer to it in the .sls file on line #3, or provide a direct URL to the exe as you’ll find in the other sls files within winrepo. The above example is a simple VMtools installation, but works absolutely fine
We now know how to push out an individual application, and add an application to the salt repo, but we need to be able to do this at scale. In the real world, we’d have a standard build for a particular type of machine. For example, our standard build in our business could require a number of apps be installed. So how do we do that?
Just as we did with the filezilla.sls, we can create a state file on a per-function basis. So lets say we need to create a state for our bastion hosts / jump boxes
Saltenv: base
Path: /serverbuilds/win_bastion_sw.sls
# Name: win_bastion_sw.sls
# Description: Standard software for Windows bastion hosts
win_bastion:
  pkg.installed:
    - pkgs:
      - firefox
      - chrome
      - git
      - winscp
      - putty
      - classicshell
      - adobereader
      - vmtools
I’d like to try and build on this standard build, beyond just software installs, so the next blog will be hopefully going a little deeper into the functionality Salt can interact with within the Windows OS.

