In the previous blog we got started with managing Windows using SaltStack Config, getting familiar with winrepo and installing software in line with our standard server builds. Next we are going to expand upon that and add the correct Windows roles, configuration and settings to our Windows Server builds.
Anyone who has been (un)fortunate to have to manage a vast estate of Windows servers, virtual or physical will know that things can quickly get out of control. When I say get out of control, I mean that literally every server has a slightly different configuration to the next.
If you’re using the traditional vSphere stack, you’d typically use templates to build your VMs, if you’re using one of the hyperscalers such as AWS, Google or Azure, then you’d more than likely use an AMI. These are fantastic for your basic Windows builds, but to make things operational, you usually need to install roles specifically for its use. In this blog, I’m going to build a domain controller and create a domain all from within SaltStack Config. Just like the other blogs, to follow this, you need to have a Salt master set up, and a Windows machine running the salt minion. To do this, follow the first of my salt blogs here.
I thought an interesting scenario might be building a domain controller, given a lot of customers are moving to the cloud – its always better to rebuild one
Lets get going. We’re going to need a state file as always, so lets create one in Config > File Server
Saltenv: base
Path: /windows/create_domain.sls
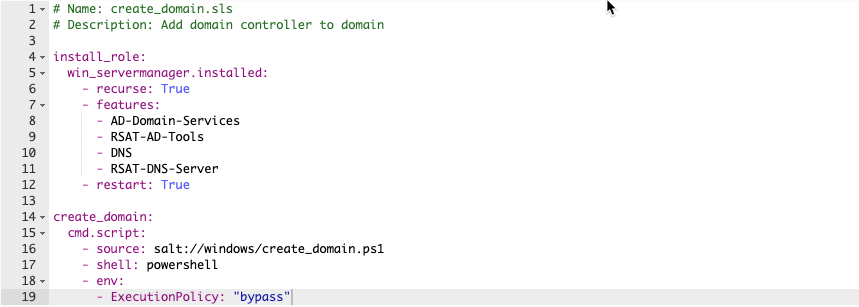
# Name: create_domain.sls
# Description: Add domain controller to domain

install_role:
  win_servermanager.installed:
    - recurse: True
    - features:
      - AD-Domain-Services
      - RSAT-AD-Tools
      - DNS
      - RSAT-DNS-Server
    - restart: True
Much like the code used in the previous blogs, each state file simply has a title, in this case ‘install_role’ and then a set of instructions.
The win_servermanager.installed effectively ensures that the relevant roles are installed with the recurse element ensuring that all sub-roles are installed. All the lines within features are those that are required to run as a domain controller and DNS server, and the RSAT tools to manage them on the server.
Lastly, there is a restart to ensure all the roles and subroles have installed correctly.
At this stage, you should have 2 critical roles, the ADDS and the DNS server set up and you can confirm this within the Windows Server Manager, in fact it will be prompting you to complete the domain services set up. We could do this manually, but why would we when we’ve got SaltStack Config?
One of the best things of having SSC, is that it can apply other scripting languages to your minions – in this case, powershell. We can build a really basic powershell script to set up a new domain/forest and all the relevant details that go along with it.
# Name: create_domain.ps1
# Description: Creates domain with pre-defined variables
# Declare variables

$DatabasePath = "c:windowsNTDS"
$DomainMode = "WinThreshold"
$DomainName = "samakroyd.com"
$DomaninNetBIOSName = "SAMAKROYD"
$ForestMode = "WinThreshold"
$LogPath = "c:windowsNTDS"
$SysVolPath = "c:windowsSYSVOL"
$Password = (ConvertTo-SecureString -String "Pass1w0rd" -AsPlainText -Force)
# Create New AD Forest
Install-ADDSForest -CreateDnsDelegation:$false -DatabasePath $DatabasePath -DomainMode $DomainMode -DomainName $DomainName -SafeModeAdministratorPassword $Password -DomainNetbiosName $DomainNetBIOSName -ForestMode $ForestMode -InstallDns:$true -LogPath $LogPath -NoRebootOnCompletion:$false -SysvolPath $SysVolPath -Force:$true
I won’t spent too long talking about this, as its pretty self-explanatory. The only ‘gotcha’ is that passwords cannot be put into the script in plain text, so you need to use the ConvertTo-SecureString function for this domain creation script to run. This caught me out!
N.B. Incase you’re curious about what “WinThreshold” is (I was), there isn’t a new domain or forest functional level for Windows Server 2019, so essentially this puts it at the 2016 functional level.
OK, back to our state file, we need to tell salt to run this powershell script, and how it. So lets append the following to our create_domain.sls file
create_domain:
  cmd.script:
    - source: salt://windows/create_domain.ps1
    - shell: powershell
    - env:
      - ExecutionPolicy: "bypass"
The above is super simple – you tell salt where the ps1 file is, you tell it which shell it needs to use, and set the execution to bypass (a powershell security feature). The cmd.script module essentially downloads a script from a remote location, in this case the saltmaster, and then executes it locally. Because its being ran locally, this can be any available language such as bash, or python, etc.
Your state file should look something like this now
As per usual, set up a job with the following details and run this against your windows minion:

Once you’ve ran this against your Windows minion, following the reboot (or two) you’ll have a new domain controller set up. Awesome huh? Just for completeness, if you then want to add a new domain controller to that same domain, the following script should work:
# Name: add_domaincontroller.ps1
# Description: Promote a new server to a domain controller
# Declare variables
$DatabasePath = "c:windowsNTDS"
$DomainName = "samakroyd.com"
$DomaninNetBIOSName = "SAMAKROYD"
$LogPath = "c:windowsNTDS"
$SysVolPath = "c:windowsSYSVOL"
$Password = (ConvertTo-SecureString -String "Pass1w0rd" -AsPlainText -Force)
# Add New DC
Install-ADDSDomainController -CreateDnsDelegation:$false -DatabasePath $DatabasePath -DomainName $DomainName -SafeModeAdministratorPassword $Password -LogPath $LogPath -InstallDns:$true -NoRebootOnCompletion:$false -SysvolPath $SysVolPath -Force:$true
The main changes on the above is the initial function of “Install-ADDSDomainController” as opposed to “Install-ADDSForest” and obviously it not requiring certain detail around the domain and forest mode.
The big takeaway from me here, is that the fileserver element of SaltStackConfig does not only give you the opportunity to build a catalog of state files, but also powershell scripts to interact with your environment which you can call from any state file.
In an enterprise environment, this becomes super powerful as you can then call upon these scripts to not only build on top of your base templates or images, but keep them consistent using beacons and reactors.
The last part of this blog that I want to throw in to this section is some of the useful commands that you can run not only from your saltmaster on CLI, but also from the SaltStack Config console. Lets look at some common commands
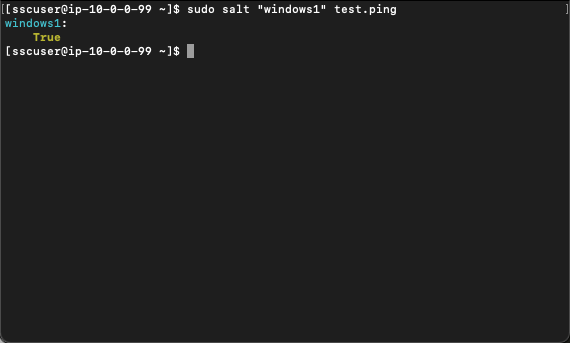
# Ping Server

salt "windows1" test.ping
This can be done by simply SSH’ing to your saltmaster, and running the above line. Hopefully you’ll get an output that looks a little like this:
So how do you do this within the Saltstack Config console? Even easier!
Go into Minions > select either the individual minion or the target group > run command.
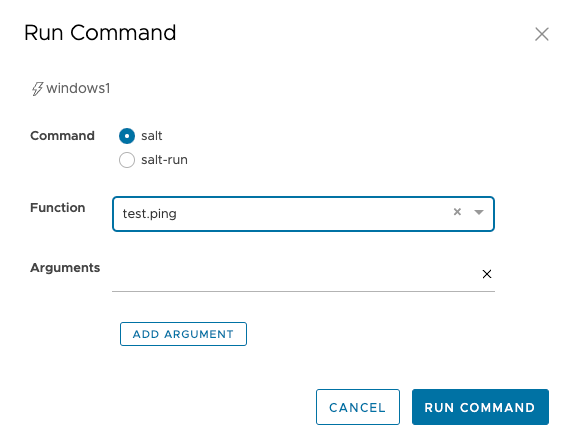
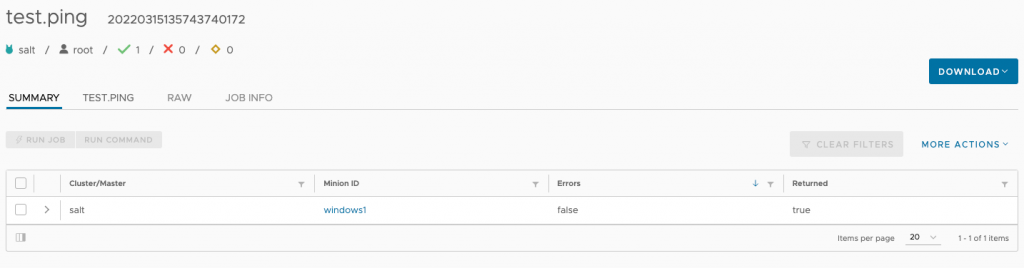
Within Function select ‘test.ping’ and run the command.
Head over to Activity > Completed, find the relevant job output and click on the JID on the right hand side:
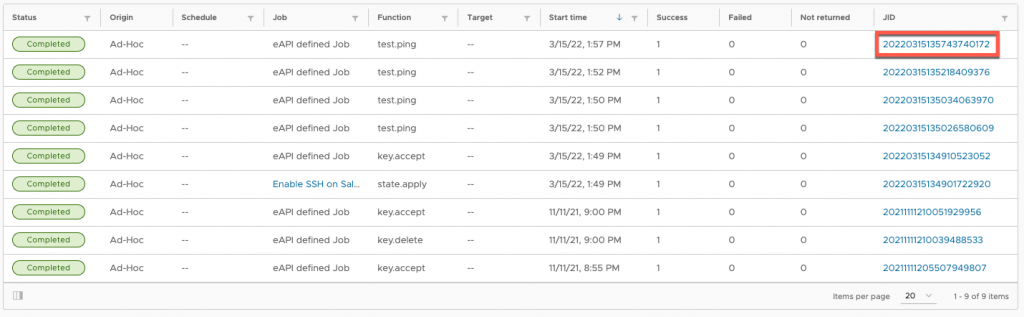
You’ll then see the output of the command:
Ping isn’t the only ‘built in’ command that exists within SaltStack Config though. Disk Usage (disk.usage) is something that is always helpful:

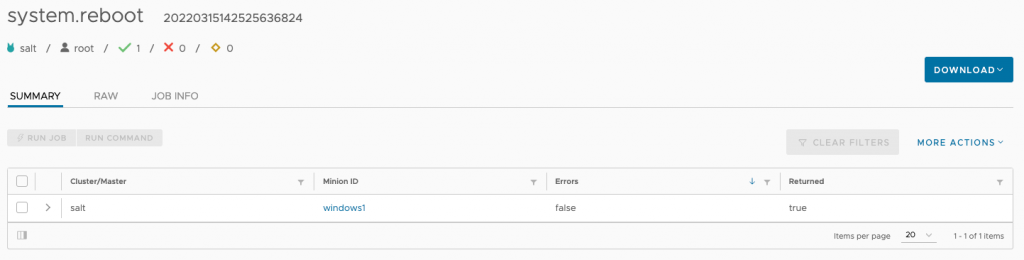
or if you want to simply reboot a machine (system.reboot)
If you want to begin interrogating the grains of the minion, simple run grains.get and in the argument field, pass simple easy-to-understand phrases such as “osfullname” or “fqdn_ip4”


And just like the above powershell example, you can run powershell commands against target groups, to say, get a list of all the names of the services currently running.
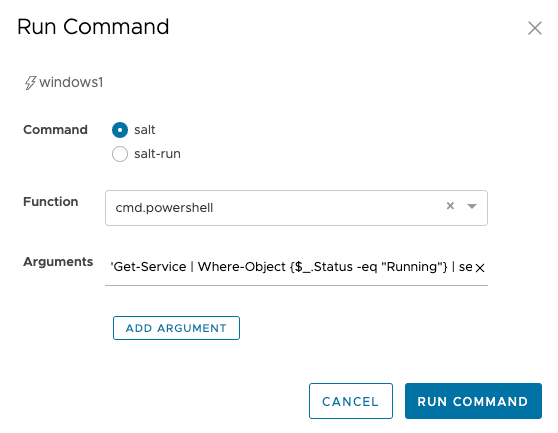
And then we’d see an output that looks something similar to this:

Hopefully this blog gives you an idea on the capability of SaltStack Configs when run against Windows machines. It can query en-masse to obtain information about a particular subset of machines, it can install Windows roles and features and you can even build a domain from it – without even logging on to the machine.

